
All right, I’ve finally decided to blog something, and I think it’s fair to start from the beginning.
Ubuntu 13.04 has just been released, so I thought to write down all the little tweaks I usually apply to my development workstation.
Disclaimer: And what do I care about your “tweaks” and all your clever stuff?, you might be wondering. You’re right, you don’t care, I write it down mainly to have it right at hand next time I have to set up my desktop, but perhaps you may find some interesting tip you didn’t know about.
Installing
You’ll have to download the iso image file, which is something about 826 MB, so you better get yourself a clever download manager. Install DownthemAll Firefox plugin and configure the Number of Concurrent Downloads and Downloads per server in the Network tab, and also the Max. number of segments per download in the Advanced tab.

Then just head to Ubuntu’s download page, choose the 32 bits or 64 bits edition, and grab a cup of coffee.
I burned it to a live usb using the startup disk creator utility. Strange enough, unetbootin, which has never failed me before, didn’t work this time.

No surprises during installation, just the usual Ubuntu installer.
First steps
You’ll be fetching quite a bunch of .deb files, so might want to install apt-fast to speed up packages installation
sudo add-apt-repository ppa:apt-fast/stable
sudo apt-get update && sudo apt-get install apt-fast
Instead of apt-get just use apt-fast.
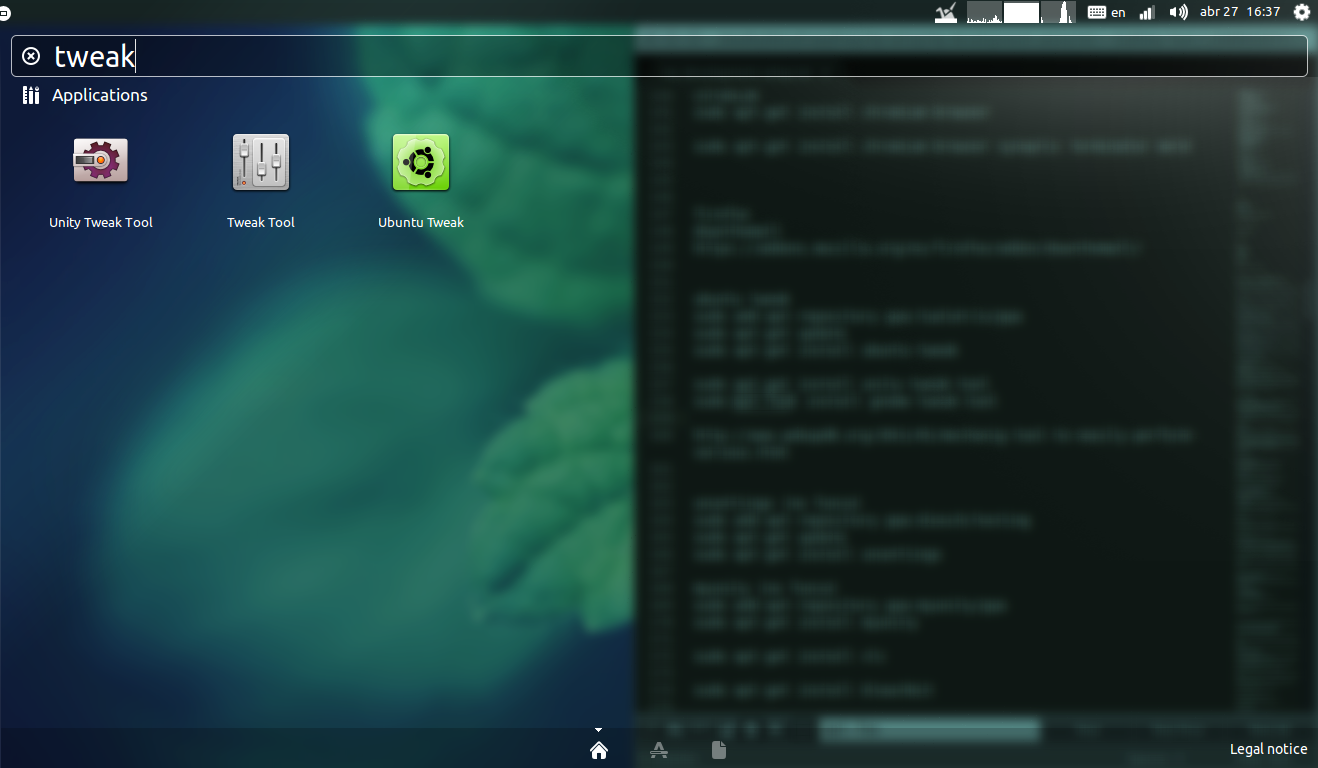
Tweaking tools
There are several tweaking tools in Ubuntu 13.04. These are my favourite ones:
sudo add-apt-repository ppa:tualatrix/ppa
sudo apt-fast update
sudo apt-fast install ubuntu-tweak
sudo apt-fast install unity-tweak-tool
sudo apt-fast install gnome-tweak-tool
Some more useful tools:
sudo apt-fast install synaptic
sudo apt-fast install bleachbit
And also y-ppa manager
sudo add-apt-repository ppa:webupd8team/y-ppa-manager
sudo apt-get update
sudo apt-fast install y-ppa-manager
I find the latest version of nautilus a bit limiting, so I rather use Nemo, the cinnamon fork of Nautilus.
sudo add-apt-repository ppa:gwendal-lebihan-dev/cinnamon-stable
sudo apt-get update
sudo apt-get install nemo nemo-fileroller
Finally I like to have the system loader indicator in the upper panel
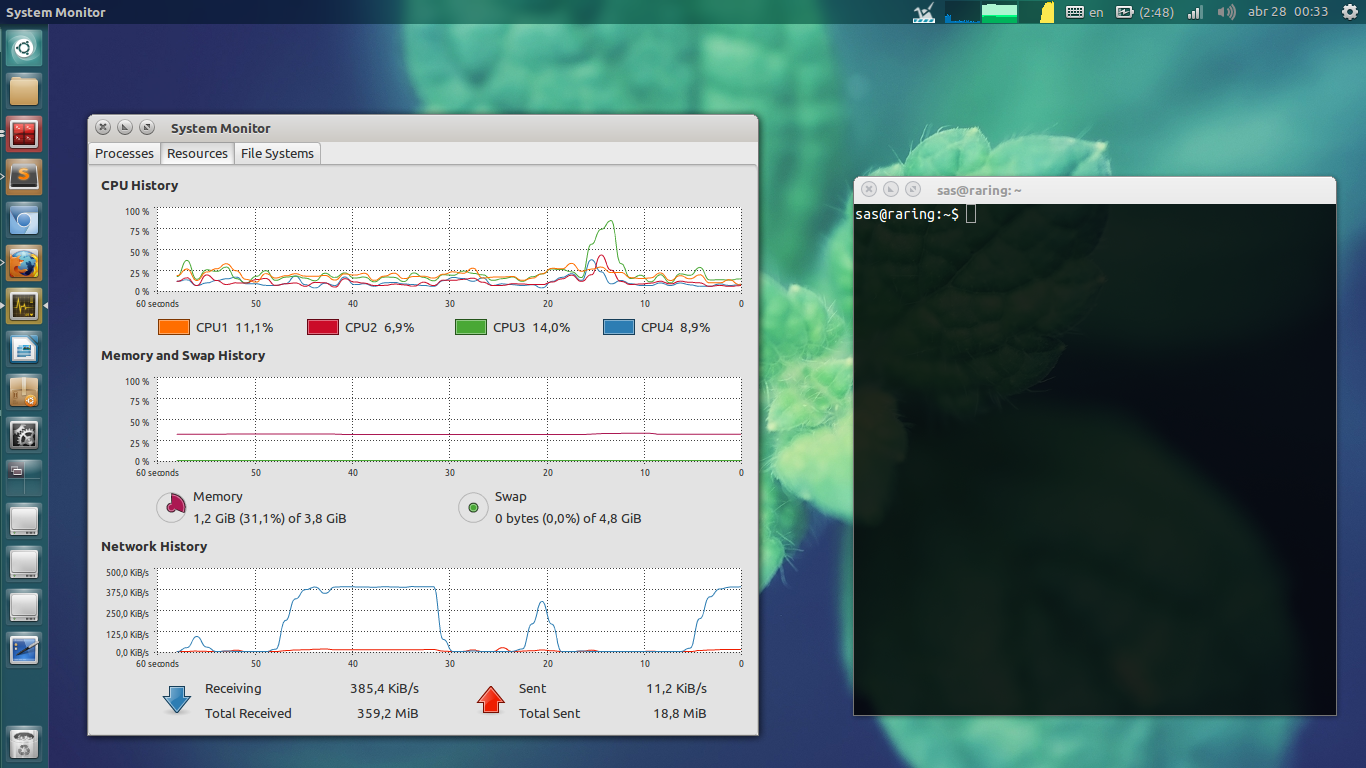
sudo apt-fast install indicator-multiload

Startup applications
By default most startup applications are not visible from the Statup applications configuration utility. Follow these steps to enable them:
sudo sed -i "s/NoDisplay=true/NoDisplay=false/g" /etc/xdg/autostart/*.desktop
Here you have an article that might give you a few ideas about which ones you might disable. And here you have more information about it.
These are what I left activated:

Cloud storage
In the old days I was pretty much accustomed to DropBox, then I changed to UbuntuOne, but the problem was that with only five 5GB of storage I quickly ran out of space. The other problem is that I was obviously looking for a multiplatform alternative.
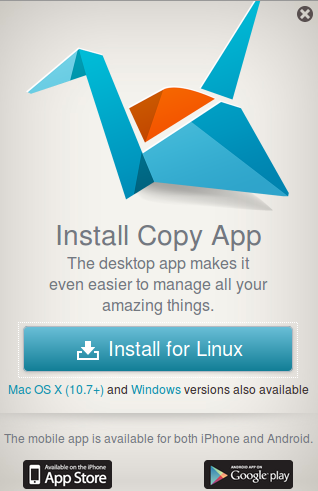
That’s when I discovered this new great multiplatform alternative to dropbox: Copy.
The good thing about it, is that you start with 5GB, but for a promotional time you’ll get extra 5GB for every referral you get, and the same goes for your lucky friend.
So if you use the following link you’ll get 10GB:
Plus 2GB if you twit about it.
So go ahead and use the link so we both get our extra 5GB.
You’ll have to download the installer from https://copy.com/install/linux/Copy.tgz uncompress it with:
tar -xvf copy_agent-1.28.0657.tgz
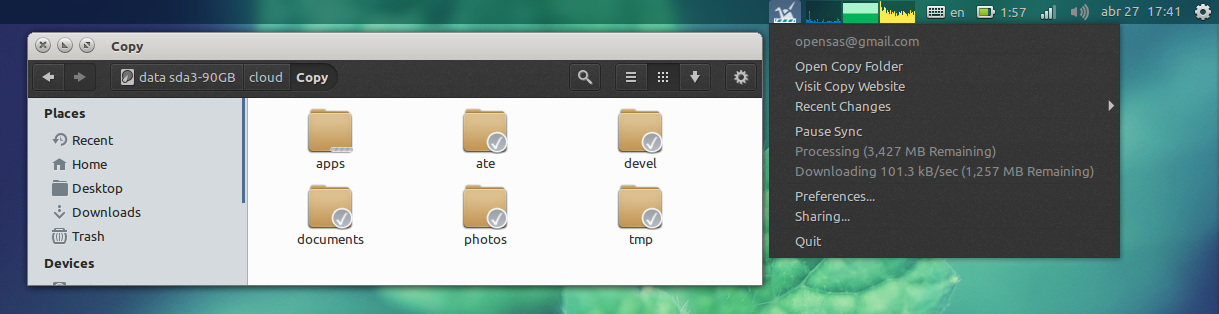
To install the nautilus overlay indicators (so that you can notice on first sight if the files are updated on your Copy remote box) just go the the folder where you uncompressed the tar file and then run
sudo ./CopyAgent -installOverlay
And then just run
./CopyAgent
to start the intallation
Here you have an article with more tips about Copy.
Like I said, I no longer use UbuntuOne, so I just uninstall it
sudo apt-get autoremove ubuntuone-client python-ubuntuone-control-panel
Appearance
Here comes the really important stuff. The looks.
This is a must, faenza icons and faience theme:
sudo add-apt-repository ppa:tiheum/equinox
sudo apt-get update && sudo apt-fast install faenza-icon-theme faience-*
Then you can install the gnome cupertino theme if you want a more mac-style window borders
sudo add-apt-repository ppa:webupd8team/themes
sudo apt-get update
sudo apt-fast install gnome-cupertino-gtk-theme
I’ve became particularly fond of the Mediterranean Light Darkest theme
sudo apt-get install mediterraneannight-gtk-theme
You have several more good-looking themes in that ppa. You can also have a look at this other repository:
sudo add-apt-repository ppa:noobslab/themes
Also, zukitwo and zukiwi are two well known and quite polished themes:
sudo apt-fast install zukitwo-theme zukitwo zukiwi
Anyway, in the end I finally settled with MediterraenLightDarkest for the GTK theme, Faenza Darkest for the icons and Faience-Ocre for the window borders.

To add a couple of more tweaks, I installed the compiz setting manager and the compiz extra plugins (I missed my wobblying windows…)
sudo apt-fast install compizconfig-settings-manager compiz-plugins-extra
I set the alt-right click to resize windows:

And then I activated the wobbly windows plugin

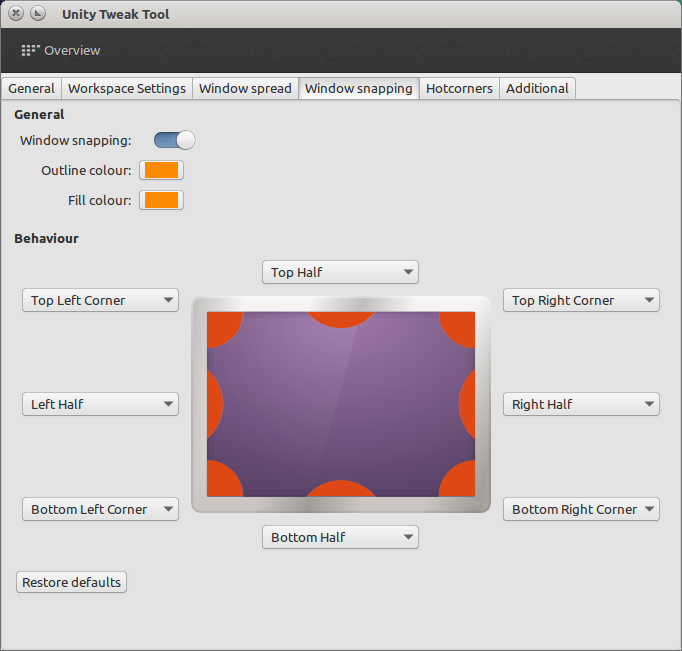
Finally, using the Unit tweak tool, I set the windows snapping to each corner of the screen:
The keyboard
I have an US american keyboard, but I usually write spanish texts, so I need to type characters like ñ, Ñ, ¿?, ü, ¡!, etc.
So I add an English (US, alternative international) keyboard

And configure the right ctrl key ans composite key and alt-shift as the changing layour hot key:

That way, when I want to type the opening question mark (¿) I select the international layout with alt-shift, then type the right-ctrl key and after that I have to type twice the “?” key. It sounds pretty troublesome, but you’ll soon get used to it.
Final touches
First we need to enable the Canonical partner repository, in order to install skype and the flash plugin installer.
sudo add-apt-repository "deb http://archive.canonical.com/ $(lsb_release -sc) partner"
sudo apt-get update
sudo apt-fast install skype
sudo apt-fast install flashplugin-installer
Then we will disable the guest account
sudo gedit /etc/lightdm/lightdm.conf
And we will add the following line at the en of the file:
allow-guest=false
I prefer the vlc media player
sudo apt-fast install vlc
And I’m also giving a try to the geary email client (By the way, it’s your opportunity to help them build the next version)
sudo add-apt-repository ppa:yorba/ppa
sudo apt-get update
sudo apt-get install geary
And a few more tools I cannot live without
sudo apt-get install chromium-browser terminator meld
Cleaning up the mess
If you don’t use empathy, you can remove the indicator on the panel bar:
sudo apt-get autoremove indicator-messages
sudo apt-get autoremove telepathy-indicator
These command might also come in handy
sudo apt-get clean
sudo apt-get autoclean
sudo apt-get autoremove
You can also remove all the unity lenses you wont be using
sudo apt-get autoremove unity-lens-shopping unity-lens-music unity-lens-photos unity-lens-gwibber unity-lens-video
You should also start ubuntu-tweak and run the janitor

I would also run bleachbit, as user and as root, to clean up the system a little bit more.
And finally, make sure you have everything updated
sudo apt-get update && sudo apt-fast dist-upgrade
Bonus track – Unity tips
Nowadays, I must confess that I feel pretty comfortable with Unity. You should just learn few shortcuts to feel comfortable with it. These are my favorites:
Just hold on the super key for a while and you’ll get a cheat-sheet with Unity’s keyboard shortcuts. My advice: do take some time to learn them.
You will also see that each item in the launcher can be launched pressing for the first item, for the second and so on. This is a great time saver.
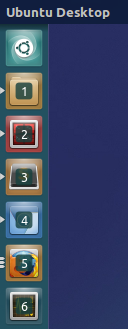
Here you can press super-1 to open Nemo, super-2 to open terminator, super-3 to open sublime and so on.
ctrl-alt-left and ctrl-alt-right will let you move to the desktop to the left and to the right respectively. Just add the shift key to the mix to carry with you the current window.
This one is rather annoying, but you’ll have to get used to it. If you have several windows of the same app (let’s say several Firefox windows), when switching with they will all appear grouped. If you want to switch between those Firefox windows you’ll have to use the `-alt combination (yeap, that’s the tilde beneath the ~ character)
And with ctrl-super-left and ctrl-super-right you’ll resize the current window to occupy the left and right part of the screen. ctrl-super-up will maximize, ctrl-super-down will restore and pressing it again will minimize it.
Finally, to create you own launcher, you’ll have to install the gnome-desktop-item-edit utility
sudo apt-fast install --no-install-recommends gnome-panel
And then follow these steps:
gnome-desktop-item-edit /usr/share/applications/ --create-new
This will make the app available to every user. If you want to create it just for the current user issue:
gnome-desktop-item-edit ~/.local/share/applications/ --create-new
For more info check this question at askubuntu
When I’m not using Unity, I usually install some kind of launcher. Synapse or kupfer are pretty simple and fine tools for that job.
Update:
I’ve just found this nice tool to visually edit and manage your launchers: ezame
just issue:
sudo add-apt-repository ppa:caldas-lopes/ppa
sudo apt-get update
sudo apt-fast install ezame
more info at webupd8.
Next steps
Finally, this is how my desktop looks like:
BTW, this is the wallpaper I’m using: minta.

Here you have a bunch of articles with nice ideas about what to tweak after installing ubuntu:
http://askubuntu.com/questions/11415/which-startup-applications-can-i-safely-turn-off
http://www.hecticgeek.com/2012/06/few-things-to-speed-up-ubuntu/
http://www.noobslab.com/2013/04/tweaksthings-to-do-after-install-of.html
http://www.upubuntu.com/2012/01/two-useful-tools-for-managing-startup.html
http://www.unixmen.com/042013-top-things-to-do-after-installing-ubuntu-13-04-raring-ringtail/
http://www.webupd8.org/2013/04/7-things-to-do-after-installing-ubuntu.html
With all these tweaks I find myself with a quite comfortable desktop. In the next post I’ll document how I set up my development environment.
For those who are anxious like myself, here’s a script that will add all the repositories, update the package list and install all the packages.
#!/bin/bash

# apt-fast
printf "\n\ninstalling apt-fast repository\n"
sudo add-apt-repository -y ppa:apt-fast/stable

# tweaking tools
################

# ubuntu-tweak
printf "\n\ninstalling ubuntu-tweak repository\n"
sudo add-apt-repository -y ppa:tualatrix/ppa

# administration tools
######################

# y-ppa manager
printf "\n\ninstalling y-ppa repository\n"
sudo add-apt-repository -y ppa:webupd8team/y-ppa-manager

# nemo
printf "\n\ninstalling nemo repository\n"
sudo add-apt-repository -y ppa:gwendal-lebihan-dev/cinnamon-stable

# appearence
############
printf "\n\ninstalling faenza-icon repository\n"
sudo add-apt-repository -y ppa:tiheum/equinox
printf "\n\ninstalling webupd8team repository\n"
sudo add-apt-repository -y ppa:webupd8team/themes

# zukiwi
printf "\n\ninstalling noobslab repository\n"
sudo add-apt-repository -y ppa:noobslab/themes

# applications
##############

printf "\n\ninstalling canonical partner repository\n"
sudo add-apt-repository -y "deb http://archive.canonical.com/ $(lsb_release -sc) partner"

# now let's install everything
##############################

printf "\n\nabout to update package list\n"
sudo apt-get update

printf "\n\ninstall apt-fast\n"
sudo apt-get install apt-fast

# tweaking tools
################

sudo apt-fast install ubuntu-tweak
sudo apt-fast install unity-tweak-tool
sudo apt-fast install gnome-tweak-tool

# administration tools
######################

sudo apt-fast install synaptic
sudo apt-fast install bleachbit

# y-ppa manager
sudo apt-fast install y-ppa-manager

# nemo
sudo apt-fast install nemo nemo-fileroller

sudo apt-fast install indicator-multiload

# gnome-desktop-item-edit utility
sudo apt-fast install --no-install-recommends gnome-panel

# show all startup applications
sudo sed -i "s/NoDisplay=true/NoDisplay=false/g" /etc/xdg/autostart/*.desktop

# appearence
############

sudo apt-fast install faenza-icon-theme faience-*
sudo apt-fast install gnome-cupertino-gtk-theme

# zukiwi
sudo apt-fast install zukitwo-theme zukitwo zukiwi

sudo apt-fast install compizconfig-settings-manager compiz-plugins-extra

# applications
##############
sudo apt-fast install skype
sudo apt-fast install flashplugin-installer
sudo apt-fast install vlc
sudo apt-fast install chromium-browser
sudo apt-fast install terminator
sudo apt-fast install meld

# clean up
##########

sudo apt-get autoremove indicator-messages
sudo apt-get autoremove telepathy-indicator
sudo apt-get autoremove unity-lens-shopping unity-lens-music unity-lens-photos unity-lens-gwibber unity-lens-video

sudo apt-get clean
sudo apt-get autoclean
sudo apt-get autoremove

# refresh everything

sudo apt-get update
sudo apt-fast dist-upgrade
Just save it to a my_desktop.sh file, and then:
chmod +x my_desktop.sh
./my_desktop.sh
Saludos
Sas

Wow Great!!! Such a long and informative article. I don’t thing that this is your first post. It seems to be that you have vast experince in blogging. Keep up the good work.
Reblogged this on Ostechnix.
I can’t find startup applications list in 13.04 =(
just open the dash (super key) and type “startup”… I don’t know the command line to open it, and it was removed from the menu in 13.04.
DownTHemAll replacements:
1. xdma: http://xdman.sourceforge.net
2. Combination of Firefox Flashgot PLugin + Prozilla command
Apt-fast replacement: apt-proz 🙂
IMO, best keys to change layout: “Capslock” for english layout and “Shift + Caps Lock” for the second one
Set the best layout on your language: the below command can analyse any text file. Run it on your native text to se is your native standard layout the best one?
Code:
sed ‘s/\(.\)/\1\n/g’ FILE_NAME | tr ‘[:upper:]’ ‘[:lower:]’ | sort | uniq -c
(replace FILE_NAME with the path to text file that it can be a book like: Don Quixote; you can find mor details here: http://www.workmanlayout.com/blog )
I prefere smplayer2: http://www.webupd8.org/2012/01/install-mplayer2-and-smplayer2-in.html which is more power than vlc on 1080. it’s because of “multikernle decoding” on smplayer2.
If your using geary, so follow this link: http://www.omgubuntu.co.uk/2013/04/geary-campaign
Have a nice time, I’ll be waiting for your next post about your own layout 🙂 my friend is writing a keyboard analyser program using “Qt”, I can share it with you if your willing; So, mail to me.
very nice tips, I’ll have a look at apt-proz. My keyboard layour is pretty simple, I just type alt-shift to switch to US international, and the I use dead keys to type Ñ, á, é í ó ú, etc.
thx man, i really appreciate posts like this one… subscribed 😉
After running the following command:
tar -xvf copy_agent-1.28.0657.tgz
It installs Copy onto my hard drive.
Then when I run this command
sudo CopyAgent -installOverlay
I get this response
sudo: CopyAgent: command not found
This is what I get, whether I’m in the Downloads folder, in the Copy folder, or the x86 folder (I’m running 32-bit ubuntu 13.04)
Then, when I run this command, in either Downloads, Copy, or x86 folder
CopyAgent
I get this response:
CopyAgent: command not found
Please advise.
Thanks.
in linux, if the program is not in the path, it wont be recognized, you have to specify the whole path
one shortcut is to just run:
./CopyAgent
while in the same directory
I hope it helps (I’ll update the blog, BTW)
saludos
sas
Another way to edit gnome menus, run:
sudo apt-get install alacarte
alacarte &
Alacarte is also added to the launcher as ‘Main Menu’
[…] Taming the Raring Ringtail, My ubuntu 13.04 setup. […]
I installed the gnome cupertino theme. How do you enable it?
You can use Ubuntu Tweak: https://opensas.files.wordpress.com/2013/04/theme.png
[…] https://opensas.wordpress.com/2013/04/28/taming-the-raring-ringtail/ […]
If you were to identify all of the repos you need to add up front, one apt-get update should do it instead of running it every time i get to a new repo. Good list though, followed a bunch
yeap, that’s exactly what I did in the script at the end of the post
Thank You. 🙂
This helped me out quite a bit.